How to Install a Wedge Anchor Properly?
A Wedge Anchor may look simple: a steel stud, a nut, and a washer. Its performance, however, depends on what happens inside the concrete. A clean, correctly sized hole matters. So do embedment depth, edge distance, concrete condition, and the manufacturer’s installation instructions. Small errors can change the result.
Industry documents help explain why installation details deserve attention. ACI 355.2 sets qualification requirements for post-installed mechanical anchors, while ICC-ES evaluation reports assess specific products under defined conditions. These reports do not provide one universal capacity for every Wedge Anchor. Values depend on the anchor model, concrete strength, installation, and other stated conditions. Check the report for the exact product—not a similar-looking anchor.
Anchorage researcher Donald F. Meinheit has contributed to technical guidance on anchoring in concrete. A concise paraphrase of the lesson in that body of work is: “An anchor’s performance depends on both its design and its installation.” This is a paraphrase, not a verified verbatim quotation. That distinction matters. So does careful work. Before drilling, confirm the diameter and depth required by the product instructions. Clear dust from the hole, seat the anchor correctly, and tighten it using the specified method. A rushed installation can seem secure while hiding a problem. The steps are practical, but they are not interchangeable; this guide explains how to install a Wedge Anchor with care and where to pause and verify.
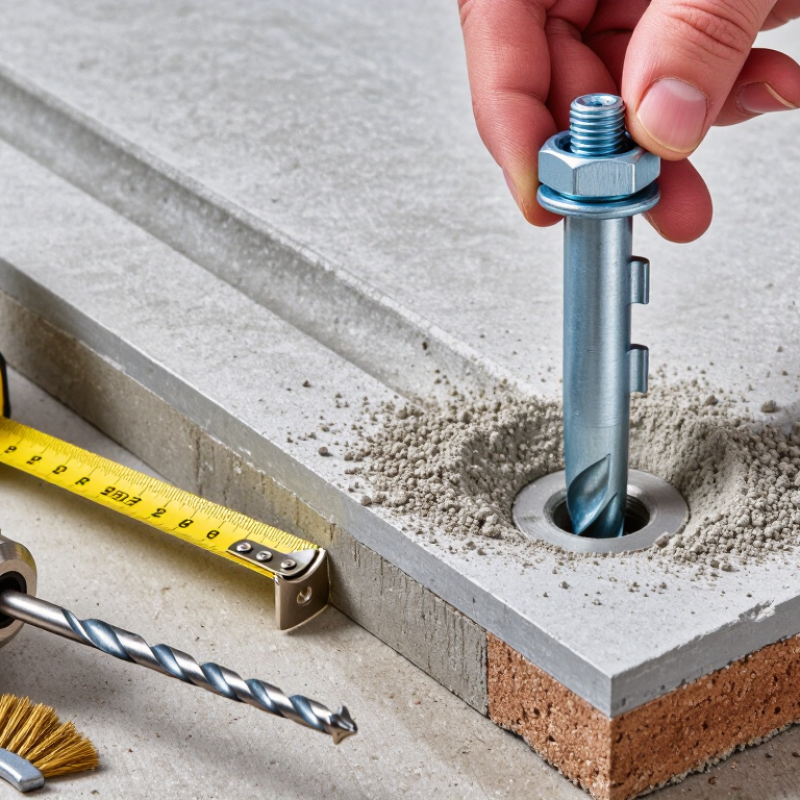
Understand Wedge Anchors and Their Installation Requirements
A wedge anchor is a mechanical fastener designed to expand inside solid concrete. As the nut is tightened, a clip at the anchor’s base presses outward against the drilled hole. That grip depends on sound concrete, correct dimensions, and adequate embedment. It is not a substitute for an anchor approved for the specific base material. Check the anchor’s installation instructions and the project requirements before drilling.
Match the drill-bit diameter to the anchor, and drill to the specified depth. Keep the hole straight. Remove dust with a suitable brush and air or vacuum; a hole that looks clean may still hold debris.
Small details matter. Check edge distances, spacing, concrete thickness, and embedment, since placing an anchor too close to an edge can cause cracking.
Insert the anchor until its washer and nut sit above the surface, then tighten to the specified torque with a calibrated wrench. Do not guess or overtighten: excess force can damage the threads or concrete.
If the hole is oversized, the concrete is cracked, or the anchor spins during tightening, stop and reassess rather than forcing it. Even careful work can miss a problem, so inspect the installed anchor before loading it.
Choose the Correct Anchor and Prepare the Materials
A wedge anchor is designed for solid concrete, so identify the base material before choosing one. Hollow block, brick, and damaged concrete may need a different fastener. Check the fixture’s weight, hole size, required embedment, and distance from concrete edges. Anchor length must account for both the fixture thickness and the embedment specified by the manufacturer. Outdoor or damp locations may also require corrosion-resistant materials. Do not choose an anchor by diameter alone. Small details matter. A product data sheet is more dependable than a quick visual guess.
Gather the anchor, a hammer drill, a correctly sized carbide bit, a depth gauge, a wire brush, and a vacuum or approved hole-cleaning tool. Wear eye protection; concrete dust can travel farther than expected. Check that the bit is not worn, since an oversized hole can weaken the hold. Mark the drilling depth, then confirm the hole will not sit too close to an edge or another anchor. Clean the hole as directed by the manufacturer. A little dust left inside is easy to overlook, and it can interfere with proper seating. Don’t rush this part.
Drill and Clean the Hole to the Required Specifications
A wedge anchor depends on a hole drilled to the specified diameter and depth. Check the anchor instructions before choosing a bit; the required bit size should match the anchor, not a visual estimate. Mark the drilling depth on the bit with tape, then use a hammer drill and carbide masonry bit. Keep the drill perpendicular to the concrete. A tilted or oversized hole can prevent the anchor from gripping properly. Do not guess. If the concrete is cracked, thin, or damaged, pause and confirm that the anchor is suitable for the location.
Drill to the required depth, following the installation instructions for any extra space needed at the bottom. Remove dust with the specified brush and, where directed, oil-free compressed air. Repeat the cleaning steps as instructed; a hole can look clean while powder still clings to its sides. Dust matters. Check the depth with a gauge or the anchor itself, and wear eye protection while drilling and cleaning. It is tempting to rush this step, but careful cleaning is easier than troubleshooting an anchor that will not seat correctly.
Insert and Tighten the Wedge Anchor Properly
Before inserting a wedge anchor, check its diameter, required embedment, and installation torque against the project specification. Drill a perpendicular hole to the specified depth; leave room for concrete dust below the anchor. Clean the hole using the method required for that anchor. Dust left inside can interfere with seating.
ACI 355.2-22 sets qualification criteria for post-installed mechanical anchors in concrete. ASTM E488/E488M-22 describes tension and shear testing; reported capacities depend on factors such as concrete condition, embedment, and edge distance. Test data for one setup should not be assumed to apply to another.
Keep the fixture aligned and place the washer and nut on the anchor. Tap the anchor gently until it reaches the required embedment, without damaging the threads. Tighten the nut with a calibrated torque wrench to the specified value. Don’t guess by feel. Excessive torque can affect the installation, while too little may leave the anchor unset. Use an impact wrench only when the project instructions permit it. Recheck that the fixture sits flat and the anchor has not turned during tightening.
It is easy to overlook a little concrete dust; I would rather clean the hole again than trust a doubtful seat.
Inspect the Installed Anchor for Secure Embedment
After tightening a wedge anchor, inspect it before attaching equipment or applying service loads. Look closely. Check the exposed threads, washer, and nut for correct seating. The washer should rest flat on sound concrete, not on loose dust or a chipped edge. Confirm the anchor appears straight and shows no visible movement or rotation during the specified final check. Do not simply tighten it harder; excessive torque can damage the anchor or surrounding concrete.
Inspect the concrete around the hole for fresh cracks, crushed edges, or crumbling material. Even a small chip can be worth investigating. A clean-looking anchor is reassuring, but appearance alone cannot confirm secure embedment. The expansion clip sits inside the concrete, out of sight. Compare installation records and measured hole depth with the required embedment and anchor instructions. Check that the concrete thickness and edge distance also match the project requirements. If the installation details are missing or the anchor seems loose, pause before loading it. Ask a qualified professional to assess it; use pull testing only when the project specifies an appropriate procedure. I have seen a tidy washer distract from a doubtful hole, so inspect the surrounding concrete too.